
How to Install Granite Countertops: Should You Do It Yourself?
By Pat Folks
- countertops
- granite
- installation
- diy
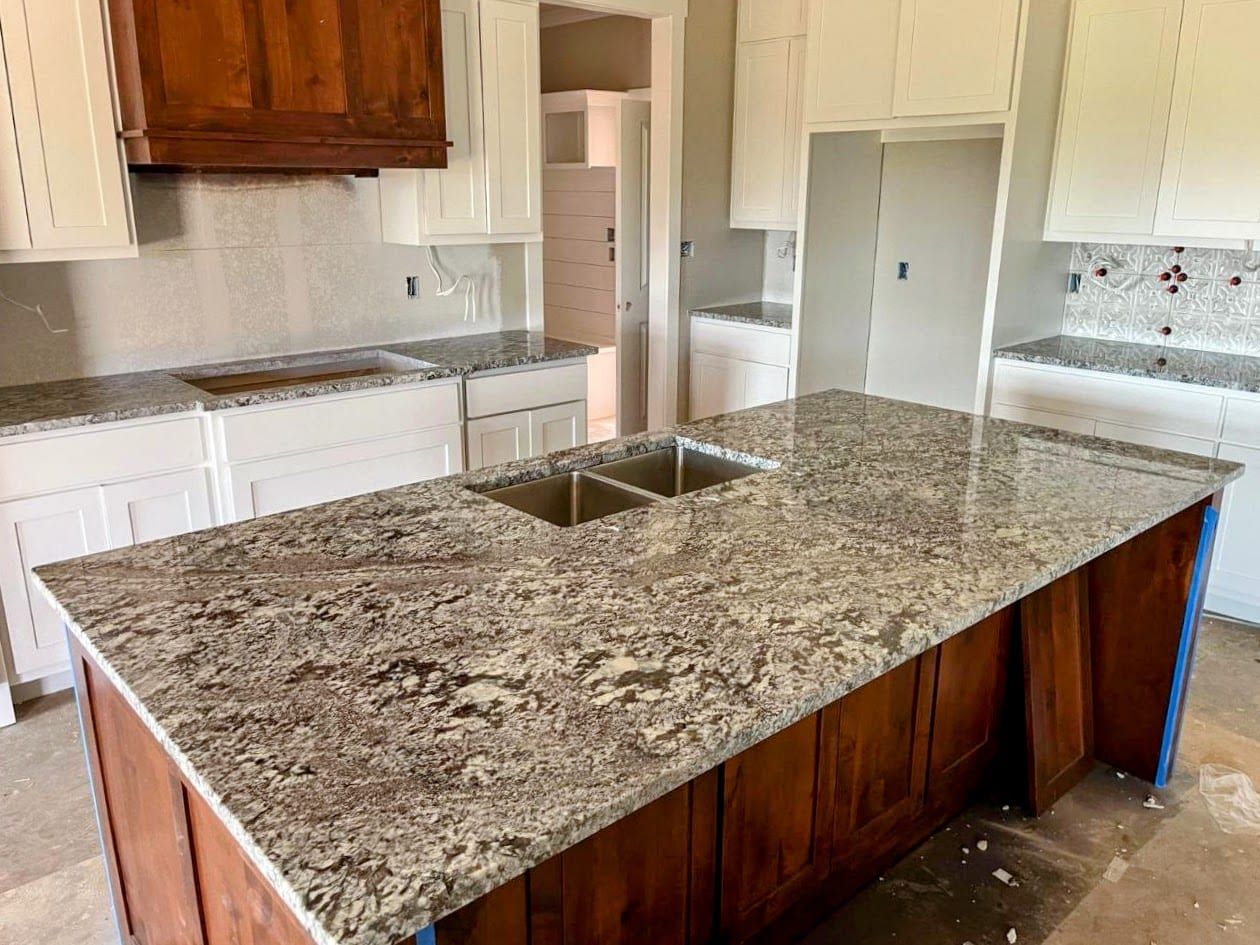
Can you install granite countertops yourself? Technically, yes. A homeowner with a truck and a free weekend can get a slab into a kitchen.
Whether it stays in one piece and looks right for the next twenty years is a separate question. How hard is it, really? Harder than the six-step version people post online. Every DIY granite job runs into the same walls. Measurements have to be precise to a fraction of an inch. The tools most garages don’t own become necessary fast. Seams and cutouts don’t forgive errors. A single mistake can cost thousands to fix.
We fabricate and install granite countertops for a living, and we hear the DIY granite countertops question from a lot of Rockwall homeowners weighing it against hiring a fabricator. Most of these projects start with existing countertops, whether laminate or a lower-grade stone, coming out before new countertops go in. Online, that process gets reduced to a handful of tidy steps. On installation day, it’s a lot more than that.
What Installing New Countertops Actually Involves
Templating is the first step, and it’s measured down to a fraction of an inch, because walls are rarely square and cabinets shift over the years.
From there, you’re selecting the slab. Natural stone means no two pieces look alike, so the fabricator walks you through selecting an individual slab based on its actual veining and color before cutting begins. The slab gets cut to that template, and the edges get polished before the slab ever leaves the shop.
Once the slab is inside the house, it gets dry-fit onto the cabinets first, set in place without adhesive to check how the edges line up before anything is permanent. A kitchen large enough to need multiple slabs adds its own complication on top of everything else: seams that have to disappear, and cutouts for the sink and cooktop that leave narrow strips of stone at risk. Overhangs need their own engineered support underneath. Each of those has its own way of going wrong, and they’re covered in the sections below.
A backsplash usually gets cut and set alongside the main slab, and sealing happens at the end.
What to Expect on Installation Day
Prepare by clearing the area of items and debris first. The path also needs clear access for a large, awkward piece of stone, which rules out a narrow doorway that forces the slab sideways.
A cracked slab can’t be patched. Replacement is the only fix once it breaks.
How Heavy Is a Granite Slab?
Heavier than most people expect. A typical granite slab has a density of 162 to 175 pounds per cubic foot . At 3cm thickness, that’s 16 to 17 pounds per square foot; at 2cm, it’s about 11 pounds per square foot. An average kitchen countertop run adds up fast: even 15 square feet of 3cm stone comes in at over 240 pounds before you’ve touched a cabinet. Granite handles compression well, carrying enormous weight without a problem, but it can’t handle bending. Lay a slab flat and carry it, or let it flex across an unsupported span, and it snaps.
Professional installers transport slabs vertically on braced A-frame racks instead of laying them flat in a truck bed. Lifting one is at minimum a two-person job, and a full kitchen island often takes three or more. There’s a specific kind of dread that sets in the first time a slab starts to flex in your hands, and it’s not a feeling worth learning about mid-lift in your own kitchen.
Homeowners who’ve moved a slab flat in a pickup bed describe the same result: a sudden crack with no warning. If you’re moving one yourself anyway, plan on at least two extra sets of hands and a way to keep it standing up for the entire drive home.
Cutting Granite Calls for Specialized Tools
Cutting and polishing granite requires specialized tools most garages don’t have: wet saws and diamond blades that keep the stone cool while it’s shaped. Polishing the cut edges afterward needs its own dedicated pads, another purchase most homeowners don’t already own.
Skip the water, and the dry heat cracks the slab more easily while throwing off crystalline silica dust. Granite runs roughly 25 to 50 percent crystalline silica, lower than engineered quartz’s 90-plus percent, but still enough to matter when it’s ground dry. Fine particles lodge permanently in lung tissue, and repeated heavy exposure is linked to silicosis, a progressive and incurable lung disease.
The documented U.S. silicosis clusters, including a cluster Texas health officials investigated in 2019 , are tied mainly to engineered stone fabrication shops, where silica levels run far higher. Granite carries a real but smaller version of that same risk, and dry-cutting it in a home garage removes the water suppression and ventilation that keep shop exposure in check.
Protection needs to match the exposure. A properly fitted N95 with wet-cutting methods covers routine granite work; sustained dry-cutting or any work with engineered stone calls for a step up, typically a P100-rated respirator.
Where Seams Go Wrong
Bad seams are the clearest sign of a DIY job. A finished joint should sit perfectly flush at the front edge, with barely any variance near the wall.
Getting there requires a vacuum-powered seam setter, a tool that pulls both slab pieces together and levels them at the same time. It’s paired with a two-part epoxy tinted on-site until it disappears into the stone’s veining.
Hardware-store caulk can’t do this job. It stays flexible, so the pieces shift independently and the seam reopens. Seams also need to sit clear of sink cutouts and away from dishwashers, where heat and moisture break down an amateur bond fast. In North Texas summers, heat speeds up how quickly that epoxy cures. A July afternoon in a Rockwall kitchen runs far hotter than a climate-controlled shop, so there’s often exactly one shot to get the leveling right before the epoxy sets.
The Cutout Problem: Sinks and Cooktops
Cutting sink and cooktop openings, including the faucet holes that go with an undermount sink, leaves narrow strips of stone along the edges. Fabricators reinforce those strips with an embedded rod so they don’t snap in transit. You’ll also want a plumber lined up to disconnect and reset the supply lines.
If the rod is ordinary steel instead of a rust-proof material, water will eventually reach it and start it rusting. As rust forms, it expands, and that expansion can split solid granite from the inside. It shows up as a crack running parallel to the sink edge, often long after installation.
Repairing it means grinding out the rusted rod and rebuilding the section with color-matched epoxy, a job for a fabrication shop.
Cabinets Have to Carry the Weight
A solid counter starts with a level base. Granite can’t forgive an uneven surface underneath it. Base cabinets need to be level within 1/8 inch across a 10-foot span , and older cabinetry frequently misses that mark without anyone noticing. North Texas sits on expansive clay soil, and the seasonal ground movement that comes with it can pull a kitchen’s cabinets out of level over the years, often with no visible sign at the surface.
When the stone bridges a low spot and weight comes down on the unsupported section, the stone cracks. Getting cabinets into that tolerance means shimming precisely over load-bearing points.
A thinner 2cm stone needs a continuous plywood deck underneath to carry its own weight, while a 3cm slab has enough rigidity to sit directly on properly leveled cabinets. Any overhang for bar seating has a hard limit too: per the Natural Stone Institute’s own guidance , the unsupported portion can’t exceed a third of the total width, and 3cm granite tops out at 10 inches unsupported (6 inches for 2cm) before it needs hidden steel brackets.
What this means for your kitchen: get your cabinets checked for level before you order stone. A run that’s out by more than 1/8 inch needs shimming or a plywood deck before granite goes anywhere near it.
Is DIY Cheaper? The “Saved Thousands” Myth
The math behind most DIY-brag posts subtracts labor and calls the difference savings. That math ignores the costly mistakes that show up once the real project starts.
A full kitchen install means acquiring an A-frame rack and seam-setting equipment, tools the average homeowner uses exactly once. The big slab yards that supply fabricators sell wholesale only through trade accounts, so homeowners can’t buy there directly. That closes off the material-cost edge DIY is supposed to have.
Crack a slab in transport or misjudge a cutout by half an inch, and that stone isn’t returnable. A self-installed countertop carries no warranty from a fabricator, and with professional installation, one mistake doesn’t wreck the whole project.
When a Lighter DIY Makes Sense
A small remnant piece or a bathroom vanity top needs far less equipment and carries much lower risk than a full kitchen installation. Remnants move easily in an SUV and skip the seam work and structural engineering a large overhang requires.
Is prefab granite easier to install than slab? For a project this size, yes. It’s an honest place for a handy homeowner to save real money. We stock remnants for exactly this, so browse what we currently have in stock before assuming you need a full custom order.
Do You Need to Seal Granite After Installing It?
Yes. Granite is porous enough to stain if left unsealed, and granite sealer typically needs reapplying every year or so. A granite-specific cleaner protects the shine better than an all-purpose spray, and acidic spills like wine or coffee should be wiped up right away. There’s also a curing window before heavy daily use, which matters more than people expect in a hot Texas summer. The full care and resealing schedule is covered separately .
Why We Fabricate and Install In-House
Much of the Dallas-Fort Worth countertop market runs like a relay, with one company templating and other contractors handling the cutting and setting separately. Every handoff creates a chance for a cutout to get measured wrong.
We’re a veteran and family-owned shop, and we keep the whole job in-house, one team, using our own CNC machines from the first laser measurement through the final seam. That’s how we catch a bad seam or a bad cutout before it ever leaves the shop. That track record is why customers keep coming back. We also offer a military discount for those who’ve served.
⭐⭐⭐⭐⭐
“This company by far exceeds professionalism and their work was awesome. I needed a new countertop for a coffee bar in my home and Patrick had his crew come out and cut on-site and install. His crew were so polite and respectful while in our home. My countertop and backsplash were installed perfectly the way I needed it to be. So very happy that there are still great companies like this that treat customers with respect and give great service too!! I highly recommend calling Patrick the next time you need countertops!!”
DIY vs. Professional Installation
The sections above cover each risk in detail. This table puts them side by side.
| Full DIY Slab | Remnant DIY | Professional Install | |
|---|---|---|---|
| Tool investment | Extensive, used once | Minimal | None for the homeowner |
| Breakage risk | High | Moderate | Covered by the fabricator |
| Warranty | None | None | Full |
| Final outcome | Visible seams, cutout risk | Fine for small, simple pieces | Flush seams, engineered overhangs |
We walk homeowners through every risk in that table directly, in person, before they ever get to this stage. If you’re still weighing materials, our breakdown of how granite and quartz compare covers that side of the decision.
Ready to find out what your kitchen actually needs? Get in touch for a free estimate , and we’ll lay it all out honestly, or reach us directly at 214-980-2778 .